
Wednesday, February 13, 2008


Tuesday, February 12, 2008
Photo Assignment # 4 - Macro Photography - Deadline: February 24

Photographing the landscapes and looking for the most beautiful places has its merit for the photographer who wants more than the average picture. Beautiful images are definitely born from those who have discipline to wake up early, and be at the right place at the right time. Now, going the extra mile and looking for that something “else” to tell a story is for those who are really into photography.
When you watch a good movie, you will see a story well told. The planning, the light, the personages, the plot, the angles, the panoramic vision, the framing, the tight closes, the shadows, the spotlights. All ties up together to tell the end of the movie.
Well, when you go on a photo journey, it should be the same. But most of us forget the details, the change of perspective, the direction of light and the perfect timing.
A good image does not happen by chance. Specially in landscape and macro photography. Carefully planned, a macro shot requires a little bit extra patience than a regular panoramic or landscape photography.
It starts with the tripod, to assure you don’t blur the image, since macro shots are shot within a few inches from the subject.
Then the appropriate lens, a macro lens, specially designed to allow you to get close and magnify the reason of how close to real life size the subject is. A typical lens will have reasons like 1:2 (your subject will be half the size of its real size in the picture) or 1:1 (your subject will be the same size as it is in real life).
The most common lenses for macro are 50mm macro and 100 macro. However, setting them in your camera body is not a proof of getting a good picture. You need to decide on what kind of lighting will be used to capture the image. Will it be backlight? Will it be sidelight? Will it be flash? Natural light? Window light? All these could be used to photograph your small subject and cause impact.
Once you decide the light, position your tripod in the height you want to work in your composition, that is, are you going to show the whole object? Half? Are you going to position it to show it as tight crop? Lot of negative(empty) space around it?
What about depth of field? Do you want to have a lot or a little?
Remember that the aperture and the distance to your subject being very close will strongly reduce your depth of field to millimeters, being more appropriate to have a big depth of field if you plan to have your whole subject in focus.
With an aperture such as 2.8 , 4 or 5.6 you will be very limited to depth of field and lots of blurriness will show in your picture. F 11, 16 or even 22 will get your subject more depth of field.
It’s your vision though and you can approach it however you wish.
Select a subject like a flower, a bug, anything little that calls your attention, and set some time for this assignment. It does require patience. Produce 3 images and share your experience of how did you do it. Explain where was the light coming from, if it was natural light or any other kind of light, what you did to compose, what were you thinking.
Make comments about what was your vision compared with the result you got. Tell which aperture, shutter speed, ISO and any other post processing you did to get your final images.
Share!
Saturday, February 9, 2008


Thursday, February 7, 2008
More window light

A few extra window light pictures.

The light is coming from a window on the ceiling of a gorgeous bathroom :)
Tuesday, February 5, 2008
Window Light Kitty
 This is Smoky, my adorable kitty.
He is not a "poser", but he is like me, he seeks the light. He begs to have the windows open so he can watch outside and get some sun.
ISO 1000
Shutter speed: 1/60
Aperture: f/3.5
Lens: Canon ef 50mm 1.4
Canon 40D
 ISO 1000
Shutter speed: 1/60
Aperture: f/2.5
Lens: Canon ef 50mm 1.4
Canon 40D
See the catchlight in his eyes?? That's the reflection of the window :)
Tuesday, January 29, 2008
Window light babies.
So I do quite a few window light sessions, and I couldn't choose just one photo to complete this assignment. It is also too bloody cold here to get close to a window right now, so none of these are new (please come back warm weather) lol. So here are my favorite window light photos with settings attached!
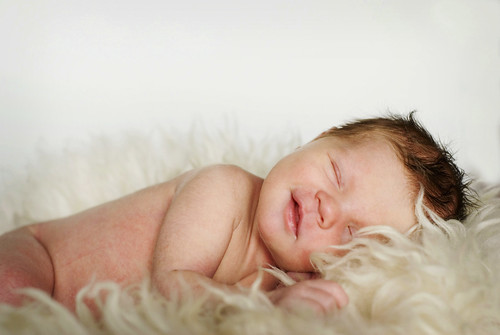
Settings: Taken with my 50mm1.8 iso 230 ss 1/400 f2.8 window camera right

Settings: D80 with the nifty 50, iso 200 ss1/400 f3.2 window light directly behind me.

This one is not a baby...but she is a babe lol. D80 with a 50 mm 1.8 iso 200, ss 1/100, f 4 window to camera right wall camera left

Settings: Taken with my 50mm1.8 iso 230 ss 1/400 f2.8 window camera right

Settings: D80 with the nifty 50, iso 200 ss1/400 f3.2 window light directly behind me.
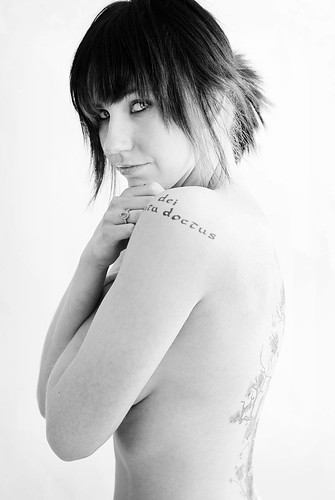
This one is not a baby...but she is a babe lol. D80 with a 50 mm 1.8 iso 200, ss 1/100, f 4 window to camera right wall camera left
Monday, January 28, 2008
Photo Assignment # 3 - Window Light Portrait - Deadeline: February 10

Window light coming from the left. West facing window. Picture taken at 2:05 pm. Reflector on the right side to bounce natural light back to her face. ISO 800. Aperture: f/7.1 Shutter speed: 1/100. Focal lenght: 45mm (taken with Canon EF 24-70 L 2.8 lens).
When was the last time you forgot about your flash and took a beautiful natural light picture?
We often forget that the way we perceive light is based on the way we see the sun light reaching over everything. In shade or under hard light, we are used to seeing faces all the time, lit with only one source of light: the sun.
So lots of people tend to mimic the sun by using flash indoors, built in flash. The light coming directly from the camera creates very hard shadows and we have that “washed” white look in snapshots though.
Wouldn’t it be so nice to create a great portrait with the light you are used to seeing? I think so. That’s why natural light is always my first choice whenever it is possible. You can easily see where the light comes from, where its shadows fall, how it will look like before you actually take the picture.
When you are using an slr camera, you are metering natural light, so you know if your camera tells you there is too much light or light is not enough at all.
You use your in camera meter to know if the light coming form a window will be enough to photograph a person by the window. You look for any window in the house. The dining room window, the bedroom window, the hallway window, even the bathroom window. If your goal is to get a beautiful window light portrait, you have to find the light. Going room by room and taking light readings is a nice and fun home assignment that you can do when you are stuck at home or just want to be more creative.
What I like doing is to keep a little notebook and make notes about metering the light from that window. I find it very helpful to study that light. It keeps me on track about the quality of that light. It also trains my eye to not overlook any kind of window, wherever I am. It is specially nice to be able to find light anywhere. And learn how to use it to create a beautiful window light portrait.
These are the questions I ask myself and how I keep the information:
We often forget that the way we perceive light is based on the way we see the sun light reaching over everything. In shade or under hard light, we are used to seeing faces all the time, lit with only one source of light: the sun.
So lots of people tend to mimic the sun by using flash indoors, built in flash. The light coming directly from the camera creates very hard shadows and we have that “washed” white look in snapshots though.
Wouldn’t it be so nice to create a great portrait with the light you are used to seeing? I think so. That’s why natural light is always my first choice whenever it is possible. You can easily see where the light comes from, where its shadows fall, how it will look like before you actually take the picture.
When you are using an slr camera, you are metering natural light, so you know if your camera tells you there is too much light or light is not enough at all.
You use your in camera meter to know if the light coming form a window will be enough to photograph a person by the window. You look for any window in the house. The dining room window, the bedroom window, the hallway window, even the bathroom window. If your goal is to get a beautiful window light portrait, you have to find the light. Going room by room and taking light readings is a nice and fun home assignment that you can do when you are stuck at home or just want to be more creative.
What I like doing is to keep a little notebook and make notes about metering the light from that window. I find it very helpful to study that light. It keeps me on track about the quality of that light. It also trains my eye to not overlook any kind of window, wherever I am. It is specially nice to be able to find light anywhere. And learn how to use it to create a beautiful window light portrait.
These are the questions I ask myself and how I keep the information:
- Which window had that light? Bathroom? Kitchen? Bedroom? Living room?
- What time of the day is the light being metered? Early morning? 7 am? 10 am? 11am? Afternoon?
- Is that a south, north, east, or west window?
- How is the weather outside the window? Sunny? Overcast? Snowing Hard? Dark outside?
- Is there any reflection outside that can change the light? Sun bouncing light on a outside white wall? Is it fall? Does fall colors provide a warmer light?
- Is it winter? Is there any snow on the floor bouncing light to the inside of the room?
- Is it summer? Does the light coming from outside in summer is any harder than the one coming from the same window when it is spring?
- Does the light become any softer in different times of the day?
- Does the sun ever reach that window and the light come through the window?
All these questions will be very important and will help to understand how the natural light works in big windows, tall windows, narrow windows.
The challenges of working with customers on location, in their homes, will be always be big, and these studies sharp our skills.
So where do you meter, when taking pictures by the window?
Just sit your subject by the window, in the brightest window of your home. Turn the person 45 degrees towards the window, so the light comes to lit both sides of the face. You meter for the bright side of the face, so you don’t blow out the highlights.
Sometimes, you won’ like the way the light hits your subject, so you may use a closer wall to bounce that light back, so you have a more even light, but with enough shadows to create depth and 3d feelings.
You can use a 5 in one reflector, a t-shirt, a shower curtain, anything white or silver (and gold too if you want warmer tones) to help you to bounce light. A simple window light and one little help from anything that will bounce the natural light back to the darker side of your subject's face.
See the window light coming from the left and one reflector used on the right side to bounce natural light back. Simple, naturally beautiful.
Now, get ready to practice. Find your own window light and go make a beautiful window light portrait!
by Moni Caron
Sunday, January 20, 2008
Ringin' in the New Year
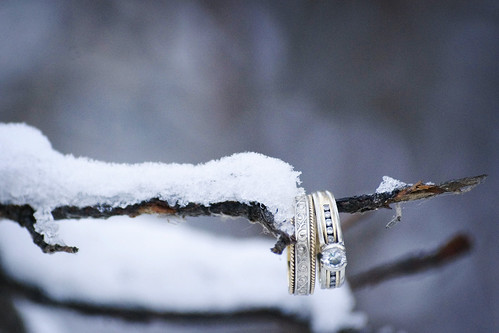
So I took the sigma 70-300 Macro out to play today. I mostly bought this lens for taking to the zoo and such, but I am finding I am in love with the macro feature. I now have a serious jonesing for a "real" macro. Anyone have a Nikkor macro they feel like selling me LOL? Anyhow this was shot at 200mm in Macro. SS 250 F5 ISO 640 all on my D80.
Friday, January 18, 2008
Posting Info
Hey everyone, I just want to add that when we post our assignments, everyone should take the time to comment on all of the new posts.
If you think it is great, then tell them, if you think they could have or should have shot it differently tell them, If you would have shot it differently, let everyone know your outlook on it. This blog is for learning purposes and this is the only way to learn. There are not very many of us on here so it won't take too much time but I know myself and a few others would like critique be it good or bad.
Thanks everyone and I can' t wait to see all your beautiful winter pictures.
Kathleen
If you think it is great, then tell them, if you think they could have or should have shot it differently tell them, If you would have shot it differently, let everyone know your outlook on it. This blog is for learning purposes and this is the only way to learn. There are not very many of us on here so it won't take too much time but I know myself and a few others would like critique be it good or bad.
Thanks everyone and I can' t wait to see all your beautiful winter pictures.
Kathleen
One for now

Canon 5D
28 - 105 mm 3.5 - 4.5
1/250 at f 14
105mm
iso 800(purley because I forgot to change it, oops)
Taken just as the sun was about to set
For the past 6 years I have lived in a small country village and we pass this spot every time we leave town. Each and every year the first big snow makes this formation and I always say that I am going to photograph it. This year, with kids in tow and playing in the ditch behind me, I finally made the effort. This was taken a few weeks ago and I figured I would share it until I get something else that I like with the new snow exposure advise.
Monday, January 14, 2008
Ode to the muffintop
Who am I (besides a procrastinator?) I am a mom, a nurse a photographer.
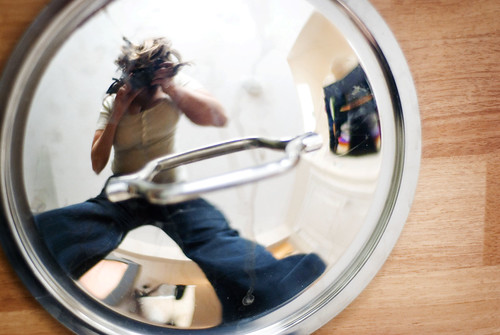
I have been taking pictures since I bought my first 35 mm with my allowence at 9 and started composing pictures in the backyard of my house with dolls and stuffies as my subjects. I am a portrait photographer at heart, I love capturing people as they do what they do, and making that connection that sends tingles up your spine. I am a mommy to 2 beautiful children who have been the inspiration for both my photography and the title of this post lol. I am a future wedding photographer who is currently using flash for everything so that I can learn to master it. I am a combo of studied and self taught, I took photography classes in high school but I find I learn better by surfing flickr and shooting all the time.
I am on night shifts and not quite lucid today. I am also getting called for dinner.


I have been taking pictures since I bought my first 35 mm with my allowence at 9 and started composing pictures in the backyard of my house with dolls and stuffies as my subjects. I am a portrait photographer at heart, I love capturing people as they do what they do, and making that connection that sends tingles up your spine. I am a mommy to 2 beautiful children who have been the inspiration for both my photography and the title of this post lol. I am a future wedding photographer who is currently using flash for everything so that I can learn to master it. I am a combo of studied and self taught, I took photography classes in high school but I find I learn better by surfing flickr and shooting all the time.
I am on night shifts and not quite lucid today. I am also getting called for dinner.

Sunday, January 13, 2008
Hi everyone, this is me

Well, this is me. I guess I got bitten by the photo bug when my first daughter was born and I got my first roll of film back from walmart that was taken with my old point and shoot. I went directly out and bought an old use film SLR the next day.
My pictures greatly improved although it took lots of reading to get a few basic techniques down. I eventually took some photography classes which led me to Kathleen and she helps me keep on track with not letting photography fall though the cracks of everyday life. This blog and these assignments are part of that venture. There is no better feeling than getting that pic and the wow feeling in your gut and a smile on your face when you know you got it. Hopefully these assignments will help me push myself foward and make time for me and what I love, photography...
this pic was taken with a Canon 5D and an 85mm 1.8 lens with camera on tripod with shutter release cable. Small softbox to camera left and at an high angle Shutter speed was 100 and apeture was 2.5 at iso 400
 ISO 100
 F/8
1/80th
140 mm focal length
lens: 70-200mm f/2.8
Aperature Priority
Time of Day: 4:38pm
Weather: Overcast
I have driven by this awesome tree for 10 years and have always wanted to photograph it. SO, one cold day I did! I pulled the car over, turned off the engine, rolled my window partway down, rested the lens on the ledge of the window, took a few test shots and then a few more (5 altogether) and voila! Exactly how I envsioned it. Converted to black and white and adjusted curves.
 Here I am! Can you pick me out? No? I'll help a little. I am the smallest dumpling, smiling away for the photographer.
 Yes, it's me wearing the dress. How girly of me, I know. But it was all my mother's idea, really. I myself was never the dress-up type, but instead revelled in playing with all the boys instead.
Today I am happily married to the man of my dreams ( that is a story for Oprah in and of itself...). We've been together for 14 years, have 2 kids-13 and 10. We all spend way too much time at the hockey rink watching our son (the 1o-yr old) play, but oh we love hockey!! (I played ice hockey in college--yes, for real!) I'm the mom with the 70-200mm lens pointing at the players at every game.
I started off my photography career in May of 2003, after selling my piano to buy a digital camera. 3 cameras later, I am almost never without one. I'm starting to get a twitch from closing one eye so much....well, not really. :-)
I am looking forward to participating in project 24 challenge! ----Tara
Photo Assignment # 2: Winter - Deadline: January 27

Winter has always been my favorite season. The idea of a slower moment in life to make us more introspective, thoughtful, a growing inner time in a beautiful season.
Colder days, but that does not mean that we can go back to the cave and come out after 3 months. This reclusive time allow for wonderful photo opportunities.
Winter provides some unique scenes all over the planet, with its variety of different winters.
In some places, a lot of wind, in others a lot of rain, in others, a lot of snow and some places have no winter at all, with their tropical heat all year round.
Since we are in the North Hemisphere and winter is showing up timid, I figured we could use some thoughts about photographing in cold weather.
Snow is tricky. And cold. Did i say cold?? Yeah. Cold. So lets start with some careful preparation in organizing the equipment.
When it is below freezing temperature (Zero degrees Celsius / 32 degrees Fahrenheit), we are subject to condensation when going out to take pictures. Condensation happens when you are outside in the cold and come home to a warmer temperature. Remember when you have the sunglasses in snow and comes inside and it fogs?? That's condensation.
So in order to prevent the camera and lens to "suffer" the cold, and to enjoy winter photography, take some steps:
- Avoid changing lens in the cold weather, the more you expose the camera to the extreme weather, the more you increase your chances of having problems.
- If wind brings dust, snow brings water, which is worse.The problem with condensation is that your camera, or anything with a circuit connected to your camera can get water once the "ice" or "cold" warms up in the camera, and that can "fry" your camera circuit, your battery, your memory card.
- If possible, carry a big zip bag to put the camera on when coming to a warmer place then outside temperature. This way the camera can slowly adapt to the new temperature and the cold will be transferred to the plastic bag.
- Carry silica gel in the zip bag or in the camera bag if you are not using any plastic clear bag. That will help to take the moisture off the camera and store in the silica gel bags.
- When coming from outside, let the camera warm up slowly.
- Give it at least a couple of hours without taking it from the camera bag or from the zip bag. This way the camera will acclimatize gradually.
- Don't try to take the memory card from the camera in this "warming" time (I call it "waking up time").
- Careful with breathing in your camera or in the viewfinder: the viewfinder can fog and the whole camera can be ruined by "freezing" the moisture of your breath inside it.
- Remember to protect the photographer in you too: layers, good ans warming socks, head covered with fleece and more, insulated shoes. You don't want to take a beautiful picture and come back home without feet.(I know that is extreme, but you get the point.)
- Get extra batteries. Cold weather drains them like crazy.
Now about exposure, making it very simple:
The camera meters for 18% grey. If you meter and your meter bar is in the middle of your viewfinder's scale, you have a "correct" exposure, unless you have extreme contrast or more than average tones, such as white or black, or dark brown and dark blues. They will "fool" your in camera meter. So whatever your meter tells you, it is wrong to start with anytime you are photographing too dark tones or too bright tones. It will tell you to make a grey snow, because it is "averaging" for 18% grey, and snow is not grey.
If you want a white snow, you need to compensate your exposure, in other words, meter for your "correct" exposure, and then change the aperture or change the shutter speed to ADD more light to come inside the camera to reach the digital sensor. This means that after you take your meter you will open up the aperture (a smaller number) in order to allow more light come in- OR keep whatever your aperture you want and make a longer shutter speed than the "correct".
In practical terms: let's pretend you meter the snow scene and your meters says you should have 1/125 in your shutter speed and f8 in your aperture. If you use that meter, you will have a grey snow. Now let's say you like f/8 for your aperture, and your scene is in shade(sun is not reaching the snow), you should take the picture with f/8 and shutter speed 1/60 or 1/45 for a shady scene. That should give you a "correct" snow, which means the snow will look bright as it is and not "muddy" dark grey. Usually, exposure for snow is about +1 to 1 1/2 f/stops if in shade. For noon pictures in the snow with sun hitting it try +2 or + 2 1/2 even +3!! In digital times, you can play and see what you did, and learn from it!
What about themes?
You can think feelings or you can think photo impact. What is not there but it is suggested...is there. Frozen flowers. Stones. Empty benches. Paths in the park. Quiet sunrises. Frozen lakes. Water. Dead trees. Shadows, shapes, shallow rivers. Horses. Door knobs. Windows. People!
Get yourself a cup of coffee, bundle up, get your equipment. Get inspired, go out and make pictures! It is winter after all!!
by Moni Caron
Subscribe to:
Posts (Atom)